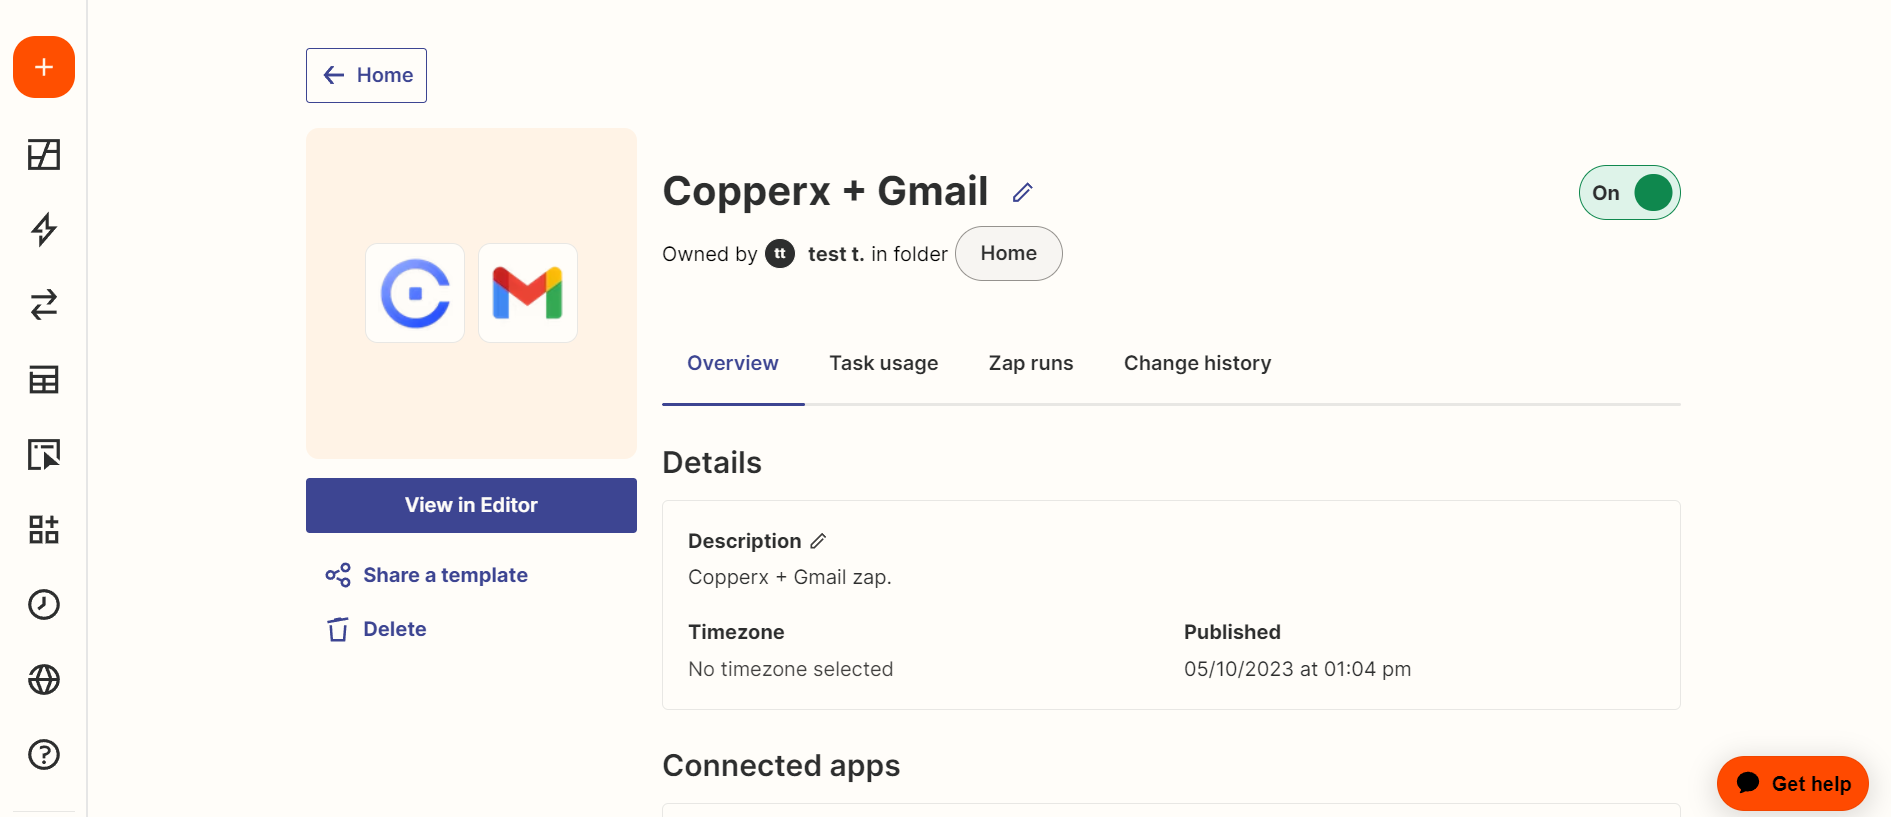
Automate Workflow with Copperx Zapier Integration
A step-by-step guide on how to use Copperx's Zapier Integration to automate your business workflows.


Are you looking for a faster, more secure way to process cryptocurrency payments for your business? Look no further than Copperx, the ultimate payment gateway that makes it simple and secure. And with Copperx's Zapier integration, you can take your automation game to the next level and streamline your workflow like never before. In this blog, we'll show you how to harness the power of Copperx and Zapier to transform your payment processing and unlock new levels of efficiency.
About Zapier
Zapier is a web-based automation tool that allows users to create workflows (called "Zaps") that connect different apps and services. With the Copperx Zap, you can automate various tasks related to cryptocurrency payment processing.
For example, you can automatically add new cryptocurrency payments to your accounting software, send payment confirmations to customers via email or text message, or trigger follow-up actions based on payment status. The possibilities are endless, and you don't need coding skills to create and customize your Zaps.
Create Zapier Automation
In this tutorial, we'll walk you through the steps to create a Zap that will trigger an email to be sent to your customers as soon as their payment is completed using Copperx as the payment gateway.
To create Zapier Automation:
- Login to your Zapier account and click on the Create Zap button from the Sidebar.

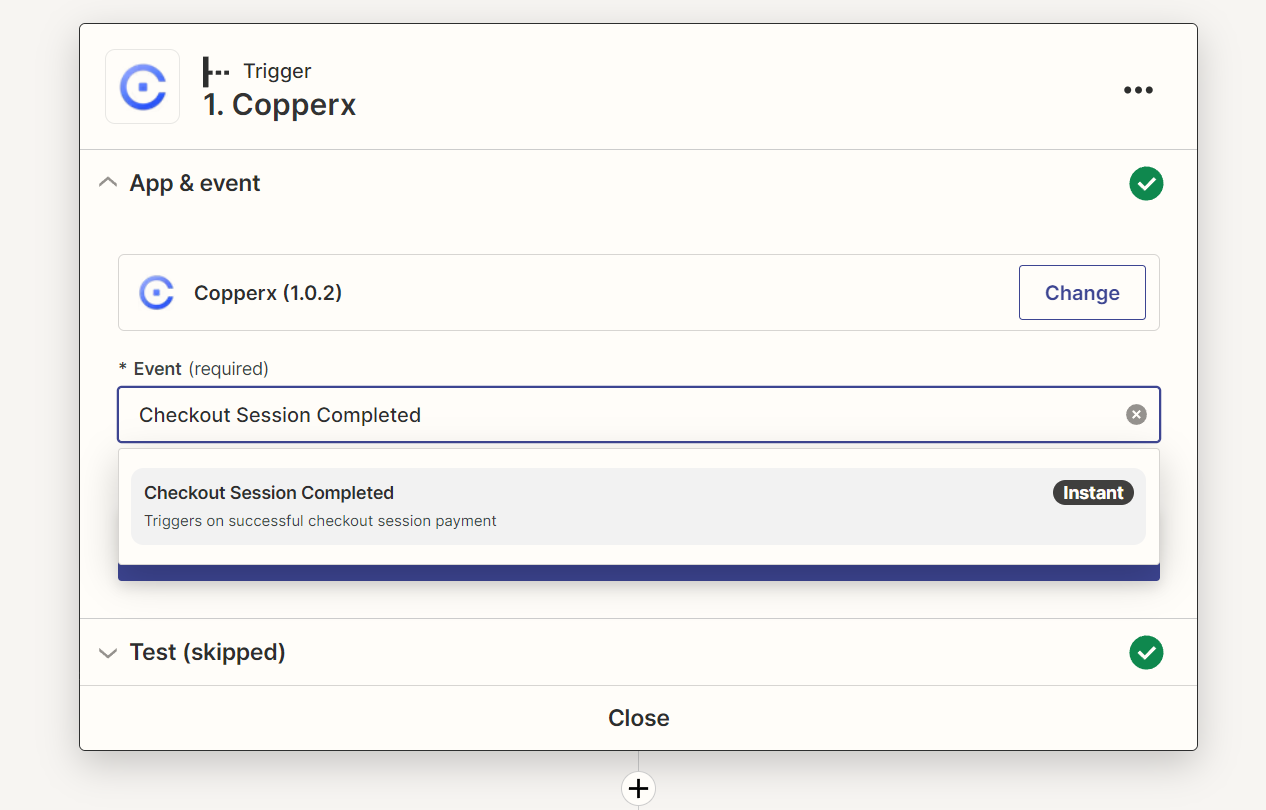
2. Now in the Trigger, search for the "Copperx" app and select Checkout Session Completed as the event and click Continue.
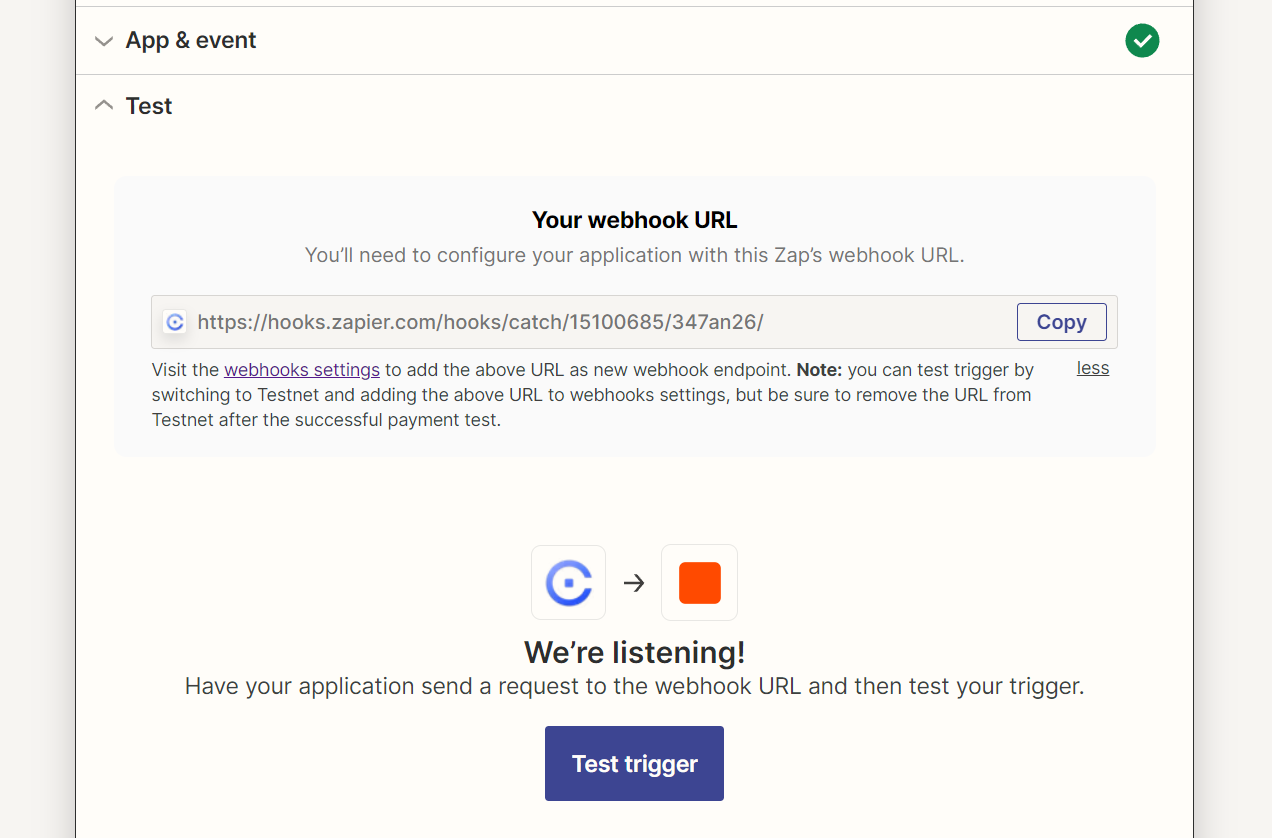
3. Next is to test the trigger, for that you need to copy the webhook URL and add it to the Copperx webhooks settings as new webhook endpoint. (Note : you can test trigger by switching to Testnet and adding the copied URL to webhooks settings, but be sure to remove the URL from Testnet after the successful payment test.)
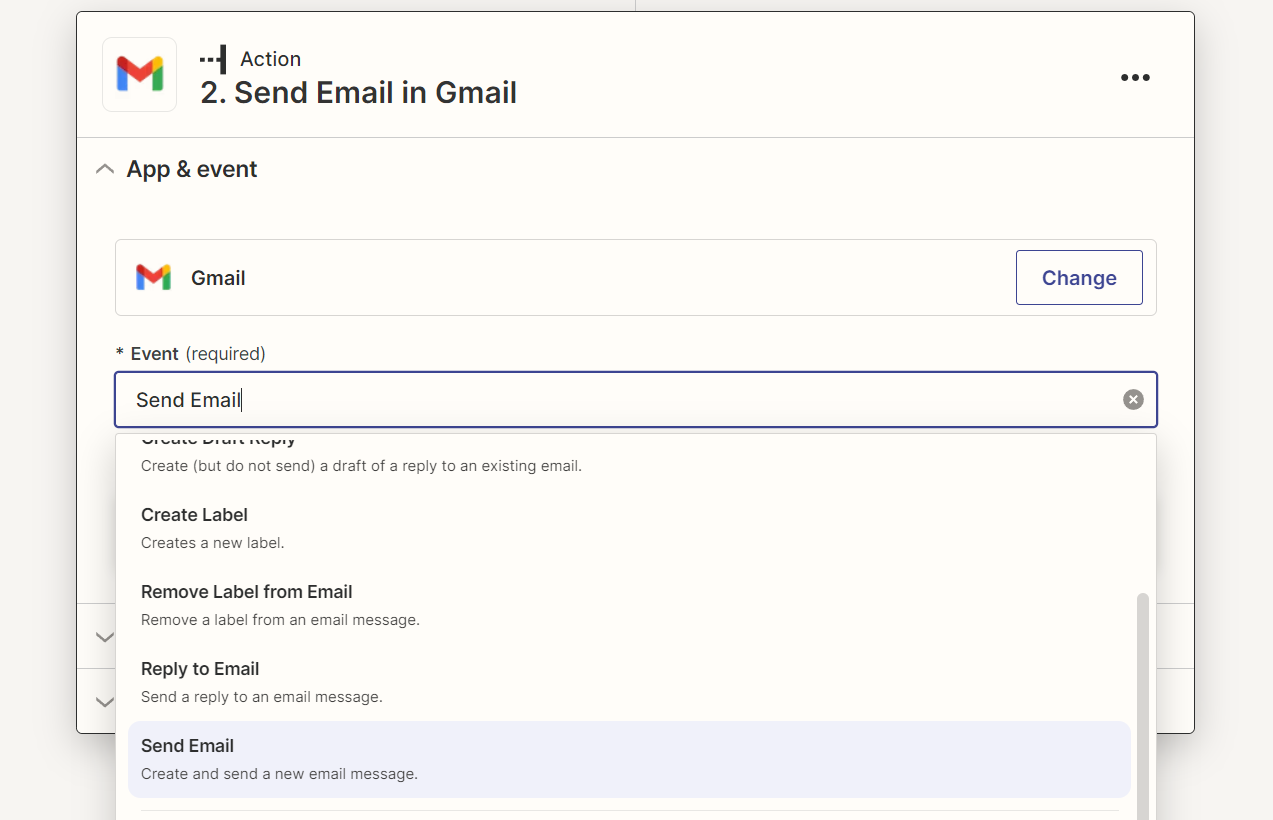
4. Next, select the email app you want to use as the Action app. For example, you could choose Gmail, Outlook, or any other email service and select "Send Email" as the event. Now, click Continue and log in to your email service.
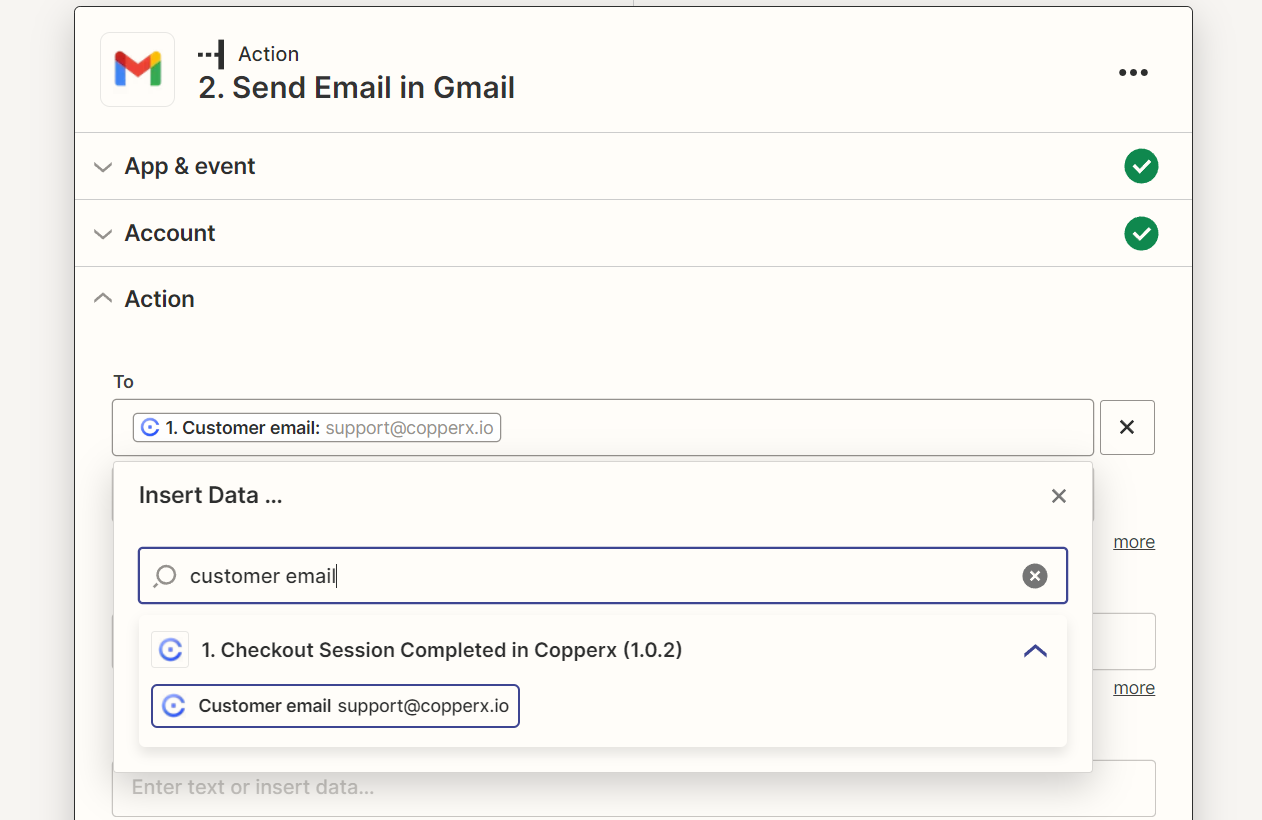
5. Now, you need to fill the Email To field as the "Customer Email" from the given option data and fill other relevant fields such as email subject and body as per your business needs.
6. At this stage, you can test your Zap and Publish it.
Once you've completed these steps, you're ready to send customized emails to your customers through this automation.
Conclusion
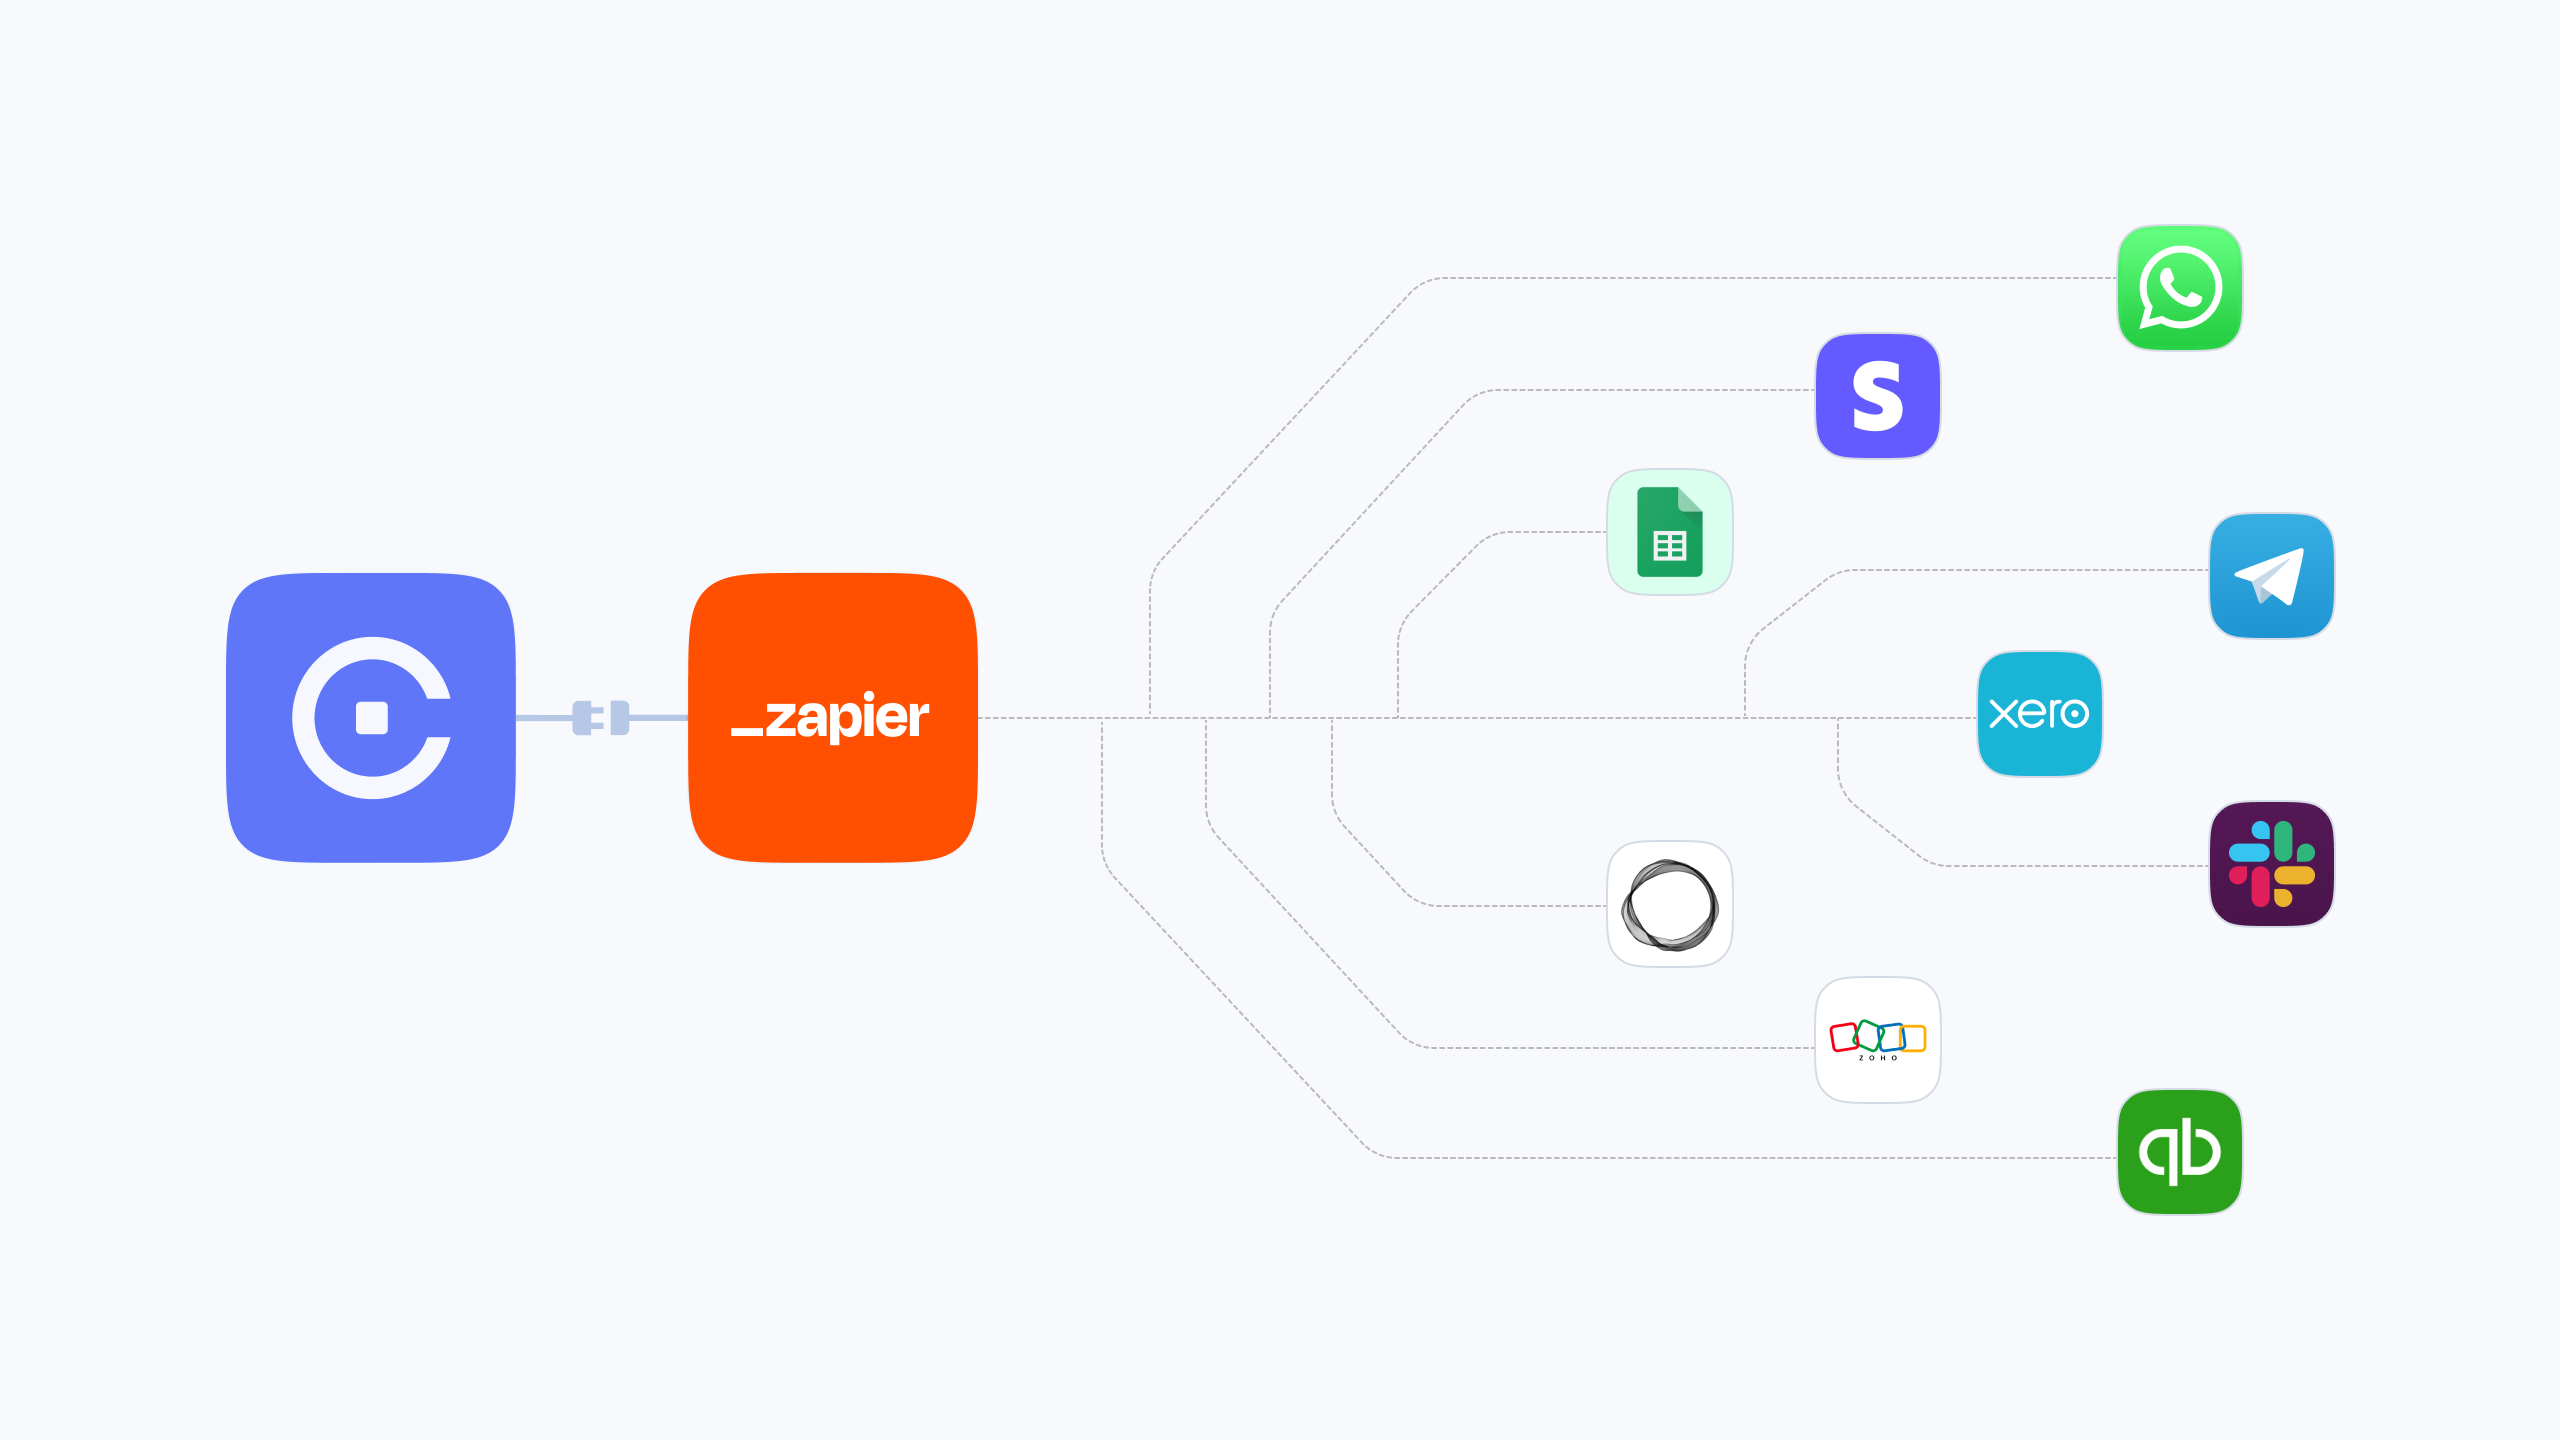
Creating a zap between Copperx and Gmail is just one example of how you can automate your workflow and improve your productivity. With Copperx's Zapier integration, you can easily connect it with a wide range of popular apps to create customized automations tailored to your specific needs. Take advantage of this powerful tool and unlock new levels of efficiency and growth for your business.